Linear Integration
Platform Configuration
Step 1: Create Service Account
-
Access Team Settings
- Log in to Linear as a team admin
- Go to Settings > Members
-
Invite Service Account
- Click Invite members
- Email:
openhands@yourcompany.com(replace with your preferred service account email) - Role: Member (with appropriate team access)
- Send invitation
-
Complete Setup
- Accept invitation from the service account email
- Complete profile setup
- Ensure access to relevant teams/workspaces
Step 2: Generate API Key
-
Access API Settings
- Log in as the service account
- Go to Settings > Security & access
-
Create Personal API Key
- Click Create new key
- Name:
OpenHands Cloud Integration - Scopes: Select the following:
Read- Read access to issues and commentsCreate comments- Ability to create or update comments
- Select the teams you want to provide access to, or allow access for all teams you have permissions for
- Click Create
- Important: Copy and store the API key securely
Step 3: Configure Webhook
-
Access Webhook Settings
- Go to Settings > API > Webhooks
- Click New webhook
-
Configure Webhook
- Label:
OpenHands Cloud Integration - URL:
https://app.all-hands.dev/integration/linear/events - Resource types: Select:
Comment- For comment eventsIssue- For issue updates (label changes)
- Select the teams you want to provide access to, or allow access for all public teams
- Click Create webhook
- Important: Copy and store the webhook secret securely (you’ll need this for workspace integration)
- Label:
Workspace Integration
Step 1: Log in to OpenHands Cloud
- Navigate and Authenticate
- Go to OpenHands Cloud
- Sign in with your Git provider (GitHub, GitLab, or BitBucket)
- Important: Make sure you’re signing in with the same Git provider account that contains the repositories you want the OpenHands agent to work on.
Step 2: Configure Linear Integration
-
Access Integration Settings
- Navigate to Settings > Integrations
- Locate Linear section
-
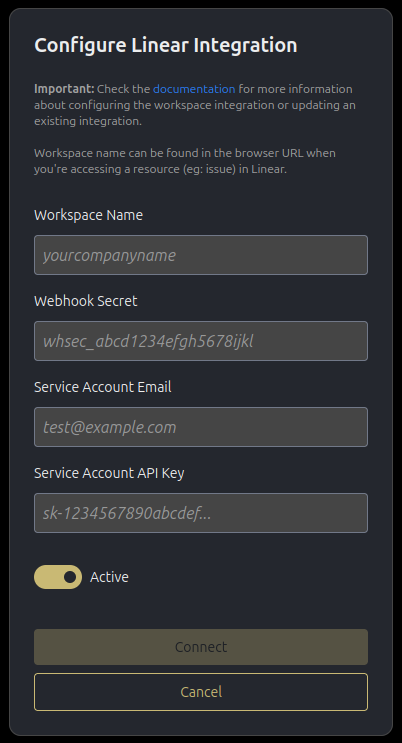
Configure Workspace
- Click Configure button
- Enter your workspace name and click Connect
- If no integration exists, you’ll be prompted to enter additional credentials required for the workspace integration:
- Webhook Secret: The webhook secret from Step 3 above
- Service Account Email: The service account email from Step 1 above
- Service Account API Key: The API key from Step 2 above
- Ensure Active toggle is enabled
- If no integration exists, you’ll be prompted to enter additional credentials required for the workspace integration:
Workspace name is the identifier after the host name when accessing a resource in Linear.Eg: https://linear.app/allhands/issue/OH-37Here the workspace name is allhands.
- Complete OAuth Flow
- You’ll be redirected to Linear to complete OAuth verification
- Grant the necessary permissions to verify your workspace access. If you have access to multiple workspaces, select the correct one that you initially provided
- If successful, you will be redirected back to the Integrations settings in the OpenHands Cloud UI
Managing Your Integration
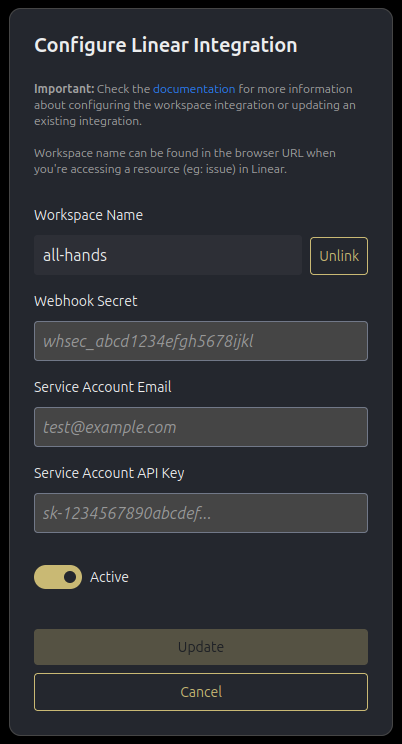
Edit Configuration:- Click the Edit button next to your configured platform
- Update any necessary credentials or settings
- Click Update to apply changes
- You will need to repeat the OAuth flow as before
- Important: Only the original user who created the integration can see the edit view
- In the edit view, click Unlink next to the workspace name
- This will deactivate your workspace link
- Important: If the original user who configured the integration chooses to unlink their integration, any users currently linked to that integration will also be unlinked, and the workspace integration will be deactivated. The integration can only be reactivated by the original user.
Screenshots
Workspace link flow
Workspace link flow

Workspace Configure flow
Workspace Configure flow
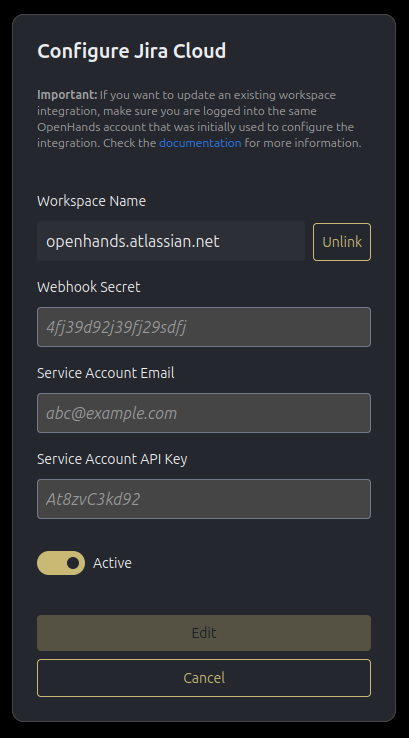
Edit view as a user
Edit view as a user
Edit view as the workspace creator
Edit view as the workspace creator